Summary
OpenClaw is all the rage as personal AI software. Many discuss running these on mac minis. While Apple Silicon has great cpus for inference, almost any PC can make web requests to model providers in the cloud and run very simply.
In this article I’ll show you how to get a Beelink SER8 up and running with OpenClaw, but in a prototype mode using LM Studio to host your own free models.
The goal is to help you get OpenClaw running without having to pay for the cloud hosted models yet (Open AI, Claude Sonnet or Opus, etc) to save money and just get a feel for things.
Install
Many others have explained how to just get it installed, so I’ll only briefly discuss what I did:
- Added a cheap 512gb SSD to the 2nd slot of my Beelink SER8
- In Windows 11, I used the Rufus installer to create a bootable linux drive. I chose to use Nobara, a popular gaming distribution. Ubuntu would be a popular choice.
- On installation of Nobara, pick the 2nd SSD (make sure not to overwrite your windows one!). I chose the option to support Hibernation with Swap, and used BTRFS. The ExFat file system may be more stable since it has been around longer.
- Important note: You’ll need to disable secure boot to get into Nobara for now. (Delete on bios startup)
- Follow my guide below to setup a free LLM model on your Beelink or other machine!
- Inside linux, run the OpenClaw curl install command.
Now, getting started with free models!
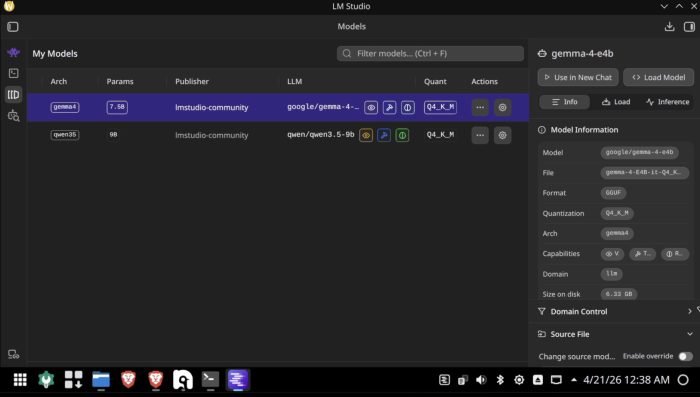
LM Studio is software that will let you run small local models on your miniPC. There are many options you can research, but Google Gemma and Qwen 3.5 are popular ones to start. For Beelink machines, probably stay with models under around 10b parameters unless you don’t mind waiting for commands.
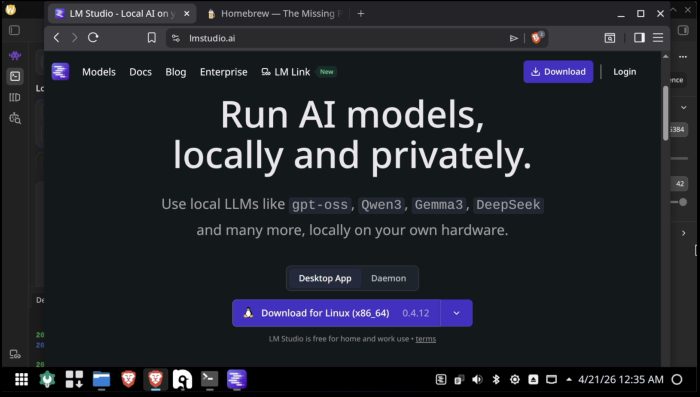
Download LM Studio
Next, search and select some sub-10b models to run OpenClaw locally. I’m showing Gemma 4 selected.
Next, go to the server setting and toggle the “running” switch at the top left. This will let OpenClaw call your server on your own machine using http://localhost:1234.
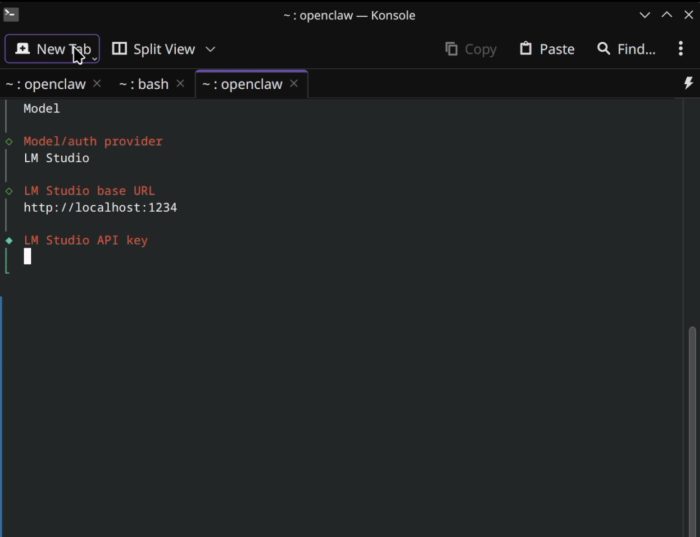
You’ll also have to go into “Server Settings”, enable “require authentication”, then “Manage Tokens”.
Unlike other apps, OpenClaw will require an api key to run, you can’t leave it empty.
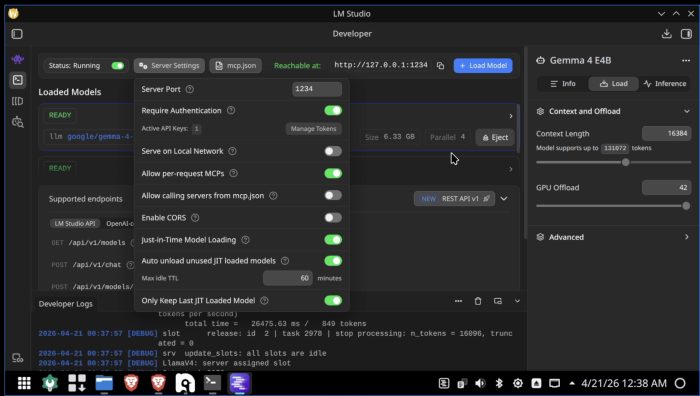
Create your token here. You’ll need to copy & paste this into the model settings later

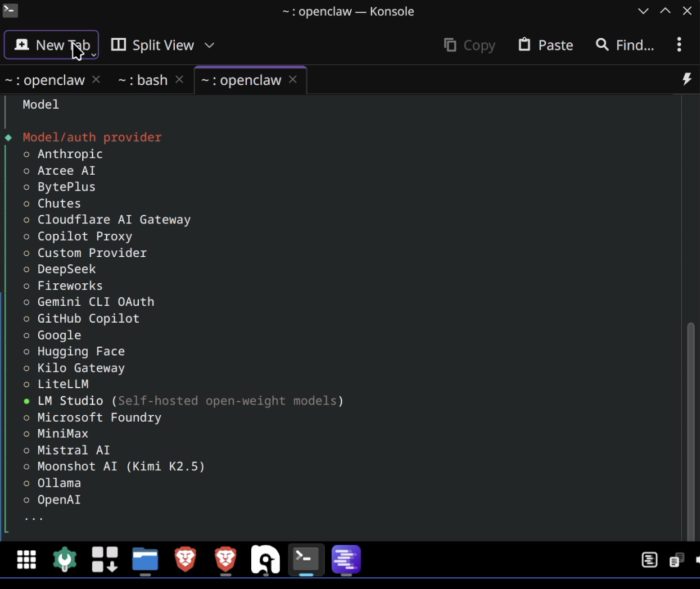
OK! Now go install open claw with the curl command found here: https://docs.openclaw.ai/install
Once you install, for model provider, pick “LM Studio”. Make sure LM studio server is running from the previous step. If you’re unsure you can run a command like this: “curl http://localhost:1234/api/v1/models” – you’ll get an api key missing error but if you see the response you’ll know it’s running.
Then, when configuring it, use these settings, and paste in your api key from LM studio settings:
After that, you’ll be prompted to choose which model you want to use. Generally it will default to the one running in LM studio, but can find others as well.
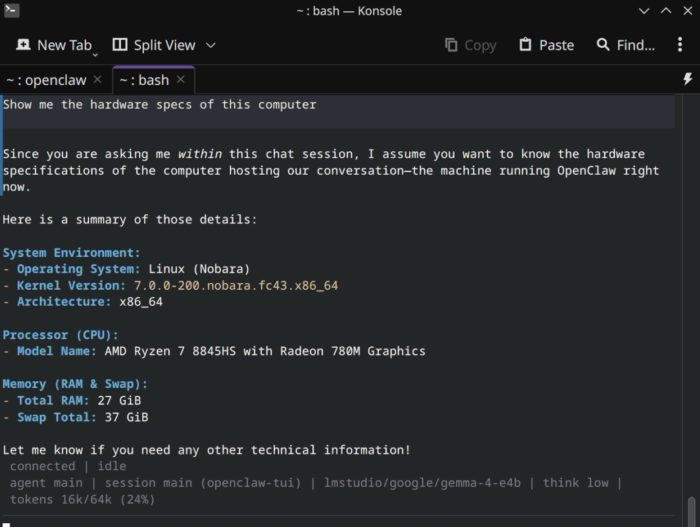
Congrats! You’re up and running. You can see the sweet AMD 8845HS cpu in my Beelink SER8 here!
A few useful commands from the command line later:
openclaw – to run
openclaw configure – to reconfigure some of the models or other plugins you might want to use.
I’d highly suggest once you are comfortable and see this running you upgrade to a better model. Either use free models from OpenRouter with a key, or go right to the better Anthropic or OpenAI models but watch your costs. I also recommend at least getting a web search plugin installed so your openclaw can call out into the world to read web pages.
Good luck!